Wednesday, September 30, 2009

Pin-Up Photo Shoot

Labor Day Sept 7th 2009
I was asked if I would like to do makeup for a photo shoot. I was thrilled! They didn't tell me what the photo shoot was for until I got there. I knew it was a pin up, but not why. I found out Kristel was doing this for her fiance. How cute! All the pictures were clean, just suggestive hehe. I am still waiting on getting them from Javier. I didn't stick around for the shoot. 

It's kind of funny how it all happened really. I met Amber Monroe months ago at MAC before I started working there. She is the sweetest girl!! I decided to start m business and ran into some problems with a friend and thought of Amber to take on the jobs with me. She agreed thankfully. I went to her work one day at DKNY and met Andrew Isaacs-Smith (who knows my cousin) and through him met Heather Nigro and then Javier Araujo (both are photographers). I met Heather and Javier at the photo shoot for the first time. Along with of course our lovely model Kristel Williamson. 
We had a really good time. I was in contact with Heather about the photo shoot and she told me to think Bettie Paige. I think I did a pretty good job hehe. We had a blast with the fake lashes. I was so glad Kristel loved her makeup. I did the hair for the first shots, but couldn't stay to do other looks. I didn't know I was going to be doing hair so I hadn't brought my stuff anyway. 

Tip on the Red Lip: Use a nude liner if you don't have a red one. It works great!! Here is Oak liner from MAC and Rimmel lipstick 166.

Friday, August 7, 2009

All about the Cheeks

No matter you have got beautiful looks or the ordinary one, the proper application of blush can bring that extra radiance and glow to your face. You just have to know the correct way of applying the blush. 

Points to remember:
  • While selecting the color of blush make sure that it matches your lipstick color.
  • You should go for a light shade of blush color for the daytime and a dark one for the lovely evenings.
  • You can select either cream blush or powder blush depending upon the suitability of your skin. Cream blush is considered good for the dry skin whereas the powder blush is good for the oily skin.
  • Make sure that before applying the blush you are finished with application of powder, foundation and eye makeup.
  • While applying the powder blush prefer to use a round brush because it gives better effects as compared to the brush that usually comes with the blush.
  • On your brush or on your middle finger place a little amount of the blush and ensure that you tap off the excess amount of blush if there is any.
  • Now look into the mirror and give a smile so that your cheekbones are raised and place the blush on the apple of your cheek. Then brush up your cheekbone toward your hairline.
  • In case you have a fuller face you should apply the blush at the outside of your face near your temples.
  • In case of high cheekbones you should apply the blush in the center of your face.
  • You should sweep the blush color in an arc following the line of your cheekbone up from the apple of your cheek to your hairline.
  • In case you are using gel blush then you should rub it in small circle on the apple of your cheeks, blending it well up into your hairline.
  • In order to give a more natural look you should apply a little blush down your cheeks, over your forehead, nose and chin.

Steps For Applying Blush

Step 1
In order to find your cheekbones suck your cheeks in. Now feel along the edge of the cheekbone. This is where you have to place the cheek color to make your cheekbones more prominent and enhance your other features as well. 

Step 2
Now give a smile to yourself. This will reveal the apples of your cheeks. Then, dip your blush brush into the powder, shake off the excess, and brush it lightly over the apple of your cheek, moving upwards toward the ear, with short, up-and-down vertical movements. 

Step 3
You should apply your blusher underneath the cheekbone but for an even stronger look you can apply some to the temple also.

Step 4
Again smile and apply the blusher to the apples of your cheeks. If you keep the blush color on the front of your cheeks then it will not only give an illusion of clear skin but also emphasize your eyes.

Step 5
In case your face cut is long and narrow then you need to create width. For this you should apply the color no higher than the lower edge of cheekbone and keep the angle horizontal. You should apply blush color only on the outer side of your cheeks, as cheek color in the middle of the face will emphasize length only.

Step 6
In case you want to enhance the length of your face then you should apply blush color in the middle of your face. The cheek color on the outer side of your cheeks will only emphasize roundness of your face. 

Items required for applying blush
For applying blush in the proper way you need these items?
  • Blush
  • Professional blush brush
  • Mirror
  • Translucent powder
  • Bronzer blusher

Saturday, July 4, 2009

Natural Look

Putting on makeup can be a daunting task for women who are not really adept at the art of makeup and are not familiar with the right techniques and with picking the right colors for their skin tone and eye color. Common fears include choosing the wrong colors for the skin or colors that do not match the outfit, putting on too little or too much, or botching the makeup altogether. Instead of putting on makeup, there are women who opt for just the ordinary face powder or talcum powder and a dash of lipstick (which may or may not be the right color for their lips either), and then they are done.  

Makeup is supposed to enhance the features of our face rather than to cover it, and nothing is more alluring than what is known as the natural look. For those who do not know much about makeup, or know nothing at all, achieving the natural look is pretty easy. The key to doing it is matching the color of your foundation with the tones of your skin, as well as using shades that go well with the undertones of your skin.  

A quick tip: when buying foundation, test the match of the product with your skin tone by applying it against your jaw line and letting it on your face for a few minutes. Go ahead and see how it looks like in daylight, rather than in artificial light to see how well it goes with your skin. The perfect foundation for you blends well with the color of your skin, so much that it is hardly noticeable.  

If your skin has beige tones. If your skin has beige tones with a touch of peach or pink, the colors you should go for are shades of peach, pink and apricot for your lips and cheeks. Cover up whatever blemishes you have on your skin with a concealer before applying the foundation, and then dust the foundation off with matching loose powder. Make sure that your foundation has SPF because skin like yours burns easily under the sun. 

Also, try not to put on too much makeup on your face because too much will look harsh on your skin and make you look older. Finish off with a shimmering peach or pink lip gloss. If your skin has olive tones. 

If your skin has olive tones, the best way to go is with foundation with warm colors like golden brown. Skin with olive tones is also generally oilier than most, so try to stay away from foundation with shimmer in it to reduce the shine. For a sun-kissed look, apply a touch of bronzer on the apples of your cheeks, the bridge of your nose and a little on your forehead.

For your lips, outline it with a nude-colored lip pencil, and then apply clear gloss. If your skin has yellow tones. If your skin has yellow tones, stay away from ivory or pink for your foundation and stick to warmer hues with a yellow base. Also, avoid using powder foundations; yellow-toned skin tends to get dry and flaky, and so powder foundations will only emphasize this unnecessarily. Finish with a light cream blush, colored pink, on the apples of your cheeks, and a light pink gloss for your lips.  

To get a smoother finish on your foundation, apply moisturizer on your skin first as a base. Remember to put on only the right amount of moisturizer and dab off any excess with tissue. Too little moisturizer will make it hard for the foundation to blend, and too much will make your makeup run off your skin.  

Achieving the natural look is easy. You don't have to be a makeup wiz to do it, and it is perfect for those who want the gorgeous yet understated look.

Wednesday, July 1, 2009

Makeup To Make Your Eyes Your Best Feature

Wide-set Eyes  
Bring wide-set eyes closer together with dark shadow:  

1) Sweep taupe shadow across the lids, keeping it darker at the inner corner and fading it out lightly as you move to the outer corner.  

2) Line the inner half of the upper and lower lash lines with a chocolate brown pencil.  

Close-set Eyes  
Widen your eyes with light shadow:  

1) Dab the lids and inside corner of the eye with white, sand or ivory shadow.  

2) Starting at the iris, rim just the outer half of the upper and lower lash lines with a charcoal eye pencil.  

Small Eyes  
Make them look bigger with white eye liner:  

1) Line the inner rim of the lower lashes with a white eye pencil.  

2) Sweep a light pink or silver shadow on the inner corners of the eye.  

Protruding Eyes  

1) Sweep dark brown powder across lid, using a heavy hand on the outer corner of eye.  

2) Smudge bottom portion of eye with same color.  

Hooded Eyes  

1) Sweep a white shadow on lids and brow bone.  

2) Pull eyebrow up from arch to apply a taupe shadow in the crease; when you let go of the brow, the crease falls in a higher place and acts like a mini eyelid lift.

Makeup To Make Your Eyes Your Best Feature

Wide-set Eyes Bring wide-set eyes closer together with dark shadow: 1) Sweep taupe shadow across the lids, keeping it darker at the inner corner and fading it out lightly as you move to the outer corner. 2) Line the inner half of the upper and lower lash lines with a chocolate brown pencil. Close-set Eyes Widen your eyes with light shadow: 1) Dab the lids and inside corner of the eye with white, sand or ivory shadow. 2) Starting at the iris, rim just the outer half of the upper and lower lash lines with a charcoal eye pencil. Small Eyes Make them look bigger with white eye liner: 1) Line the inner rim of the lower lashes with a white eye pencil. 2) Sweep a light pink or silver shadow on the inner corners of the eye. Protruding Eyes 1) Sweep dark brown powder across lid, using a heavy hand on the outer corner of eye. 2) Smudge bottom portion of eye with same color. Hooded Eyes 1) Sweep a white shadow on lids and brow bone. 2) Pull eyebrow up from arch to apply a taupe shadow in the crease; when you let go of the brow, the crease falls in a higher place and acts like a mini eyelid lift.

Beautiful Eyes!

Of course rule number one for beautiful eyes is getting enough sleep. Here are some other tips to help keep your eyes looking beautiful:  

1) To lighten dark circles around your eyes, grate a small peeled cucumber or potato. Apply the pulp to small gauze squares. Then put the squares on the dark area and lie down for 20 to 30 minutes. Sponge off the residue.  

2) Smooth eyelids and erase wrinkles by applying whole milk to the area and letting it remain there all day. Repeat frequently. The butterfat in the milk will nourish the skin.  

3) Achieve eye sparkle this way: Moisten cotton pads with ice water or witch hazel. Lie down and close your eyes with the soaked pads over them. Rest for 10 minutes. Now put a light foundation shade beneath your eyes to disguise any lines or shadows. Use your regular makeup shade on your face.  

4) You can reshape your brows this way: Cover the brows with an opaque makeup base. Now draw in a new brow line with an eyebrow pencil. Try one shape after another until you find one that makes you look bright and more youthful. Then use the penciled line as your guide to tweezing. Note: Pluck eyebrows before bedtime so any redness will disappear overnight. Never remove the hairs from above your eyebrows.  

5) When using pencil apply in small feathered strokes. Start at inner corner and work outwards. Blend the color with a brush.

Tuesday, June 23, 2009

Money Saving Tips

  1. If you have a drawer full of half-used lipsticks, don't throw them away and buy more. Take a pillbox and dig out the lipstick colors and put them in each square. You'll have a great carrying case and palette to create new colors like the pros do.
  2. You can use a great lipstick color as a cream blush. Choose lighter shades and blend on after foundation but before powder.
  3. No need to buy one shimmer highlighter shadow for the eyes and another for the face. A single shade serves both purposes.
  4. When your mascara is dry and not applying well, run it under hot water for 5 minutes. Good as new.
  5. Brow gel is a waste of money. Use regular hair gel on a brow brush or old toothbrush for the exact same effect.
  6. For a whiter smile, brush teeth with a bit of baking soda.
  7. Instead of expensive facial scrubs, use a small handful of regular white sugar. Just lather up your face with a cleanser, then scrub in the sugar using your finger tips in small circular motions.
  8. Q-tips work just as well as brushes. However, for really good, inexpensive brushes, visit your local art supply store.
  9. Vaseline is one of the best eye makeup removers ever.
  10. When your favorite shadows or blushes break, don't throw them away. Put the remains in empty film canisters and use them like loose powders.

Monday, June 15, 2009

RED RED RED!!!

I am a redhead and love the color red. Growing up I didn't think I could ever wear a red lipstick. Now I find that I can. But there are some rules and I have easy tip to help you to see reds better when shopping. Tip: Bring a piece of white paper to the store and wipe testers on it. When viewing the red against white, it will be easier to detect if there is a blue (cool) or yellow (warm) tint in the product. You can do this at a makeup counter or a store like Ulta where they do have testers.  

The Right Red 
All women can wear red lipstick no matter what shape their lips are or what coloring they have. For red-shy women, try one that's super sheer, like a sheer lipstick or a stain. I have one from MAC that's a slimshine called Urgent! It's great! For all-out glamour, choose a classic, cream-finish lipstick. For help choosing the right shade of red:  

Fair complexions- flattered by cool reds (like cherry or the color of a red rose).  

Redheads- looks great wearing warm reds (like tomato or brick).  

Medium or olive skin- looks best with classic true reds (like apple).

Dark skin- can pull off deep reds with ease.  

Good luck on your search for your red lips! Remember if you wear red, don't go crazy with the eyes for every day wear. Pick one or the other.

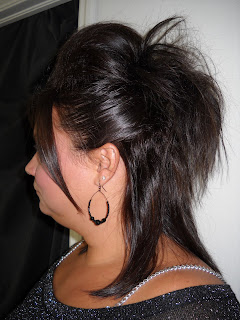
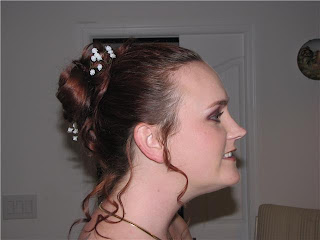
Photo Shoot 6/13/09

I thought I would add some of the pictures I did this last weekend of the girls I had model hair and makeup for me. They turned out so good, especially considering I am not a photographer with the proper equipment. I am working on scheduling an actual shoot after I have my daughter. I did each girls hair and makeup! We had a blast. Thanks to my girls for helping me out!!


Thursday, June 11, 2009

Technique and blush types

Pop of Color Using 2 shades of blush, apply your natural color and then add a pop of brighter color on top. The natural shade looks great at first, but often fades easily. The brighter shade alone is often great for evening, but too much of a contrast for every day. This layering technique offers natural brightness. When using a bronzer, skip natural color and layer the pop color on top. Using a natural shade on top of bronzer makes the cheeks look dirty. And we don't want to look dirty.  

Here is a list of different kinds of blush formulas:  

Powder- easiest formula and works for all skin types. 

Gel-sheer color, blending bit more difficult, works well for smooth skin. 

Cream- smooth, leaves dewy finish, great for dry skin. 

Cream/Powder- goes on as cream dries to a long-lasting powder finish, best for normal skin. 

Cheek Tints- similar to gels, sheer for stained look, difficult to blend, works only for smooth skin. 

Chubby Pencils- portable, easy to blend, best for normal to dry skin. 

Pot Rouge- blendable color for normal to dry skin types, usually creamy in texture and packaged in pots, provide sheer stain on cheeks and medium coverage on lips.  

Tip: Never use your blush as an eyeshadow as it is too red and will make the eyes look sore and tired...unless that is what you are going for.

Tuesday, June 9, 2009

Bumpits!!!!

For $19.99 plus shipping and handling, plus shipping and handling for the "free" big Bumpit you can get 2 large, 2 mini, and the Hollywood Bumpit. That's 5 pieces. OR you can go to your local Bed, Bath & Beyond and purchase their kit with 1 mini, 1 large, 1 Hollywood, 1 rattail comb, and lil hairstyling booklet for $9.99 ($10.59 including tax, and you can get it even cheaper if you have your 20% one item coupon!) 
It's a great deal!!! I have short hair and it even worked for me. When I got it home I got it out right away and played with it. The styles in the lil booklet are so cute! It even does this awesome french twist. So pretty!! 
All you have to do is tease your hair, hairspray it and put the Bumpit in and spread your hair over it to cover it up. You may see the lil combs from the Bumpit, but it's not that bad. That's why you have to tease your hair. The comb they give you is awesome too, you can use that by itself anytime!
I wore the large one to church the next day just as a simple regular hair day, nothing special, just down and when I got home 3 hours later and took out the Bumpit my hair still had the volume. I really liked that!! 
I often pull my bangs back in bobby pins so when I tried it with the Bumpit I loved it even more. It takes all the time out of teasing and trying to get it to look right. So easy!! I would recommend this for anyone! I can't wait till my hair grows out more so that I can do the french twist and play more with pulling it back. It does give me that volume that I love!! I will have to take some pictures soon. I haven't had much chance to use the Bumpit's in my everyday life because I am a mom of a 2 year old with another lil one on the way in 4 weeks. But I will try and play soon and get some pictures up to show you how awesome they are!
Have you tried these before??

Thursday, June 4, 2009

Eyeshadow for blue eyes and blonde hair.

For blue eyes and blond hair the best looking eyeshadow colors are violets and lavenders or neutral tones. Use the violet on the lid and in the crease of the eyelid. Use the lighter color lavender above the crease to the eyebrow bone for a dramatic night look. Use natural colors for daytime. 


Eyeshadow recommendation for blue eyes and blond hair: Natural tones for day and purple hue's for night!

Eyeshadow colors for brown eyes


Brown eyes look great in blue and pink tones as well as golds and burnt oranges. The intensity of color you wear depends on your skin tone. For fair skin, use a soft blue on the eylid, plum on the outer edge of the eye, and pink under the eyebrow. For medium to deeper skin tone, the plum could be used on the lid and into the crease area. Line eyes with a navy or plum color and black mascara.

Do You Really Need an Eyelash Curler?

I have very small lashes and they are straight! I have a hard time getting them to curl, much less look longer than they really are. A curler is helpful for those times I wear my fake lashes! I also tried a little trick my sister-in-law taught me. Heat up your curler with a hair dryer. But of course not for long!!! Only a few seconds because you don't want to burn your eye. Test it out on your hand first and wait to let it cool down more if it's too hot. 


The number one rule to remember with curling your eyelashes is to make sure your eyelashes are clean. You don’t want to curl them after you apply mascara. If you do, you run the risk of damaging them and breakage can occur.


How do you know if you need to curl your lashes? Consider the natural texture of your hair…is it wavy or curly? If so, then your lashes probably follow suit and curl naturally when you apply your mascara. If your hair is as straight as a board, then an eyelash curler will be useful. Curling your lashes will open up the eye area and make them stand out more. 

Invest in an eyelash curler that is metal and has a rubber pad. You should replace the pad every three months because eventually it will flatten out and not curl as effectively. Don’t be afraid to get right down the root of your eyelash so that you get the maximum curl. Hold it for at least 20 seconds, squeezing gently. Make sure you completely release the handles before removing the curler so you don’t yank out your lashes!

Give it a whirl!! Good luck!! 

Blush Tips

  • Draw an imaginary line downwards from the center of the eye.

  • This is the furthest point on the cheek where blush should be applied.
  • Apply blush along cheekbone from hair line downwards to avoid ending up with a heavy "blob" of color on the cheek. 
  • Always remember less is best.

  • Be sure to do the blush test. Once you are done with your entire makeup stand back, look in the mirror. Check to see if your face is ‘balanced’. You should have on just enough blush to make you look as though you are blushing. If you have on any more than that you need to tone it down.

  • To soften blush apply some powder over your blush. In the evening you have a little more liberty and so you could go a bit heavier according to the look you wish to achieve.
  • When applying blush use a darker shade to contour your face and "lift" your cheekbones. We recommend light colors of  blush to highlight.
  • Use your blush brush to apply blush with small half-moon shaped strokes moving from your hairline to your cheek bones. Do not apply close to the nose. Keep your blush on the cheek bones.
  • If you have sallow skin, pick a foundation that disappears on your face. To counteract your skin tone choose a pink or rosy blush.
  • For a very natural look, apply blush on the cheekbones and eyelids matching the color of the lipstick.
  • To tone down blush, apply a dusting of powder on top to subdue the color.
  • Never overdo your blush application, tap excess blush off your brush before applying.
  • Use a very small amount of blush for mid-day makeup touchup. The oil from your skin will grab color and intensify it.

  • Invest in a big fluffy blush brush just as makeup artists use. It will give you a soft, even blush of color.

  • Apply blush after powder for smooth, even look with no streaking.

  • Glow Without Blushing. When you just want to add warmth to the skin instead of a standard blush color like rose, peach or plum, use a light to medium bronzing powder in place of blush.

  • When you wear blush, DO find a color that is not too red for your skin tone since you will look sunburned.

Hiding Imperfections

Concealer is more dense than foundation, allowing fuller coverage of trouble spots and hyperpigmentation (red areas). It can be used over foundation or on it own, and has greater staying power. Remember, a little goes a long way!

1. Since the skin under your eyes is more transparent, it tends to look dark, especially at the inner corner near the bridge of the nose. To even out the tone, concealer is a must. Using liquid concealer, gently pat over dark under-eye circles (don't sweep it across the entire area), then blend with your ring finger.
(I actually don't use my finger...I use a brush and I bring it down to my cheek area. I feel it opens and brightens my face more this way.) 

2. To cover trouble spots and imperfections, apply a thicker cream concealer onto the blemish or flaw. Then lightly press with a makeup sponge.

Tip: Choose the shade of your concealer carefully. When testing out shades, pick one that matches your skin tone or one shade lighter. It helps to use a mirror outdoors to see how shades look on your skin in natural light.

Tip: Prepare your skin with a light SPF moisturizer before applying concealer for a smoother application.

Revlon Pure Confection highlighter

I was walking in Ulta last week and spotted this. I had just been reading a book by Carmindy and remembered some of the things she said about highlighting. I decided to pick this up and give it a whirl. 
I really like it!! It has been compared to MAC's Mineral powder Lightscapade, but it's way cheaper. It is a little bit different than MAC though. This product is under $10 ($8.99).
It gives a great shine/glow and is buildable. Any age can wear this. Older skin can wear it and not be afraid of the glittery look or the creases in the wrinkles. It works for any skin tone. The whole thing is one color, you won't be able to get the different colors individually with your brush or anything. On me it has a white kind of look. I have heard others have gotten more of a golden tone, but I am very pale. It's not a pink tone like it may seem. Try the Revlon Brightener for that. I love how it luminates!! 
Pure Confection won't make you look oily because it's a powder and it will give you that dewy look everyone is going for. What I also love about it is that it doesn't brush off every where like a loose powder. It stays on your brush and goes on where you put it. Can't go wrong with that!!!
It's great for highlighting on the eyes and just above where you wear your blush. You would use this as a companion to blush or blushes. Highlighters are perfect for those days you don't want to wear a lot of makeup. You don't have to put on eyeshadow and a lot of blush if you use a highlighter. On your eyes you put it on top where you normally highlight and then in the center areas near your nose. Also out the outside of your eyes as well. Then on top of your cheeks, about two finger widths below your eye. 
Give this a try. You will love what you see when you put it on!! 

Wednesday, June 3, 2009

I have a 'Bright Future' (Style Warrior)

So I bought the Style Warrior eyeshadow Bright Future. Great yellow color!! I love the truer color eyeshadows. What I mean is I like more the primary color of the tone. Anyway, I love yellow eyeshadow. I had bought it and forgotten that I had bought NYX palettes from Ulta a few days before. I am pregnant and don't remember everything...hehe! They were having a fantastic deal where you buy 2 get 2 free. I picked out 4 palettes and got 12 colors for like $15.00! I got home after shopping at MAC and noticed 2 of them had yellow colors in them. So I tested it with the MAC Bright Future. Yep, they are pretty much the same colors. The pigments in NYX are pretty good, but as always I recommend using a primer underneath to help bring out the color better.
These are the 4 color palettes I got from Ulta. NYX isn't too shabby! You will notice the blue, yellow and purple one is like the Style Warrior purple and yellow colors. Don't get me wrong I love MAC, but now I can buy this cheaper and buy my other MAC stuff like foundation and stuff instead from MAC. I don't have all the money to go to makeup right now with another lil girl on the way. Oh my eldest daughter who is 18 months plus dropped my orange palette there, that's why it's broken.
Bright Future is on the right side and the NYX is on the left. Can you tell the difference?

Are you scared of lipgloss colors?

One thing to remember with sheer glosses is that they are less intense than they appear in the tube. Lips don't look neon, but instead nicely flushed – as if you just had a strawberry. Get the look with M·A·C's A Rose Romance See Thru Lip Colour in Secret Crush. I love the Style Warrior lipglass in Liberated. It's a sheer yellow gold pearl with a frost texture. It looks great over the lipstick Purplerite. It doesn't come out yellow. Don't be afraid to give it a try! When we are talking color we can't forget about the reds!! One of the hands-down hottest shades of red lipstick ever is M·A·C's Russian Red. It's gorgeous for summer!

Tuesday, June 2, 2009

Foundation types for each skin type

Foundations are available in many different formulas. Choose one that is right for your skin and style and has a consistency you like to use. Use the following guidelines to choose your formula. (It never hurts to go to a counter and have them try it on you before you buy any, this will also help in choosing your color...I love my MAC counters!!)


*Don't test colors on your hand or wrist. Test several shades on the side of your face. I will do an update on this later.

Tinted Moisturizer
For normal/normal-to-dry skin. Sheer, light-weight coverage. Alternative to foundation. 

Tinted Face Balm
For extra-dry skin. Sheer coverage. Hydrates and gives dewy finish. Balm actually plumps the skin and reduces the appearance of fine lines.

Stick Foundation
For all skin types except oily. Easy spot coverage and is buildable for medium o full coverage. Best for photography.

Liquid Foundation
For dry to extra-dry skin. Hydrates and smoothes, providing medium to full coverage.

Moisturizing Compact
For dry to extra-dry skin. Hydrating formulas provide meduim to full coverage.

Whipped Foundation
For combination skin and great for skin with texture. Balances the skin by hydrating dry areas and absorbing oil in the T-zone. Medium to full coverage.

Oil-Free Liquid Foundation
For oily skin. For combination skin in the summer. Absorbs oil and smoothes while providing light to medium coverage. 

Oil-Free Cream Foundation
For normal-to-oily skin, Absorbs oil, providing medium to full coverage. A good choice to cover acne and large pores.

Oil-Free Powder Compact
For oily skin. Provides medium to full coverage. Because of the portable packaging, compact foundations are great for touch-ups. (I recommend having a brush with you to apply instead of a sponge.)

Mineral Powders
Suggested for very oily skin. (Check your color, oil can change the color of the powder, and they can appear dry and pasty.)

Eyeliner that is more than eyeliner!

M·A·C Fluidline in Blacktrack as a must for all makup bags. Black eyeliner is the one product that works with any hair color or complexion. 
It's not a pencil or an automatic. It's a cream that is ultra-smooth, Fluidline’s gel formula provides the precision of a liquid liner with a silkier, softer finish. Goes on “foolproof” with a brush in an easy dip-and-stroke action. Long-wearing. Smudge-proof. Lines up in a rich array of colours and finishes.
It's great for when you want to do really fun creative looks too! So much freedom! You can add glitter on top or eyeshadow to bring out the color more. Give it a try!

Prime Importance!!

Applying a makeup primer prior to the foundation is a must in order to make your makeup stay put on for longer and to look flawless all night long. A good primer will prepare your skin for the makeup application, creating a protective base for longer lasting makeup. Apply the primer after moisturizing your skin and before the foundation. You can apply it over the entire face or only to any shiny areas of the face, usually the nose, chin and forehead. applying a makeup primer works especially well for those with oily or combination skin as it reduces the excess shine by absorbing the excess oil on the skins surface and make any large pores appear smaller and less visible.

Wrinkles! Help!!

I was asked about wrinkles today so I thought I would share with everyone some ways to help with treating and avoiding them.

First is most obvious I think, avoid the sun. Granted I live here in Florida and it's hard enough to do that. So when you can't avoid the sun, use sunscreen. 
Don't smoke, get adequate sleep, and don't squint. I have also heard to sleep on your back to help. 
Eat more fish, the cold water kind. Salmon is the best. Essential fatty acids help nourish skin and keep it plump and youthful, helping to reduce wrinkles. Eat soy too. Trade your coffee for cocoa. Cocoa helps prevent sun damage. And of course eat more fruits and veggies!
Another obvious thing to do is to use moisturizer. Even if you have oily skin. You will trick your skin into thinking it has produced enough. Use morning and night. Don't over wash your face. Tap water strips skin of its natural barrier oils and moisture that protect against wrinkles. Wash them off too often, and you wash away protection. Moreover, unless your soap contains moisturizers, you should use a cleanser instead.
Alpha-hydroxy acids (AHAs). These natural fruit acids lift away the top layer of dead skin cells, reducing the appearance of fine lines and wrinkles, particularly around the eyes. Retinoids (including Retin A). The only FDA-approved topical treatment for wrinkles is tretinoin, known commercially as Retin A. Retinol is a natural form of vitamin A found in many over-the-counter products. 
Topical treatments that will help with sun damage and rejuvenating collagen production are: vitamin C, idebenone, growth factors, and pentapeptides.

Some products I really like are Stri-Vectin and Dermologica. If you have an Ulta around you I suggest going there and getting a facial. I used to work there. That's how I am familiar with these products.  You will get a 20% off your first-time appointment for skin care. Go and enjoy!!
Plus the first Tuesday of every month if you are a student you et 20% off your entire purchase including hair services. There are somethings that do not apply. 

Determine your skin type

There are different skin types which are classified into five division’s namely dry skin, normal skin, oily skin, combination skin and sensitive skin. There is a common and easy step to determine your skin type so that it becomes possible to identify it and to take further necessary steps. For this all you need is a piece of tissue to wipe which is clean. When you wake up in the early morning it is suggested that you wipe your face with the clean tissue that you have and observe it. For those having normal skin, the oil does not come on the paper and your face does not feel tight or flaky. If your skin is oily then there would be oil on the tissue which is seen as transparent spots. The oil comes out usually from the nose, forehead and cheek parts. On the other hand if there is oil only in the center part then it is a combination skin. In such people oil comes off from the forehead and nose which is considered to be the oiliest part of the skin, but does not come from the cheeks. For those who have dry or normal skin they will have no oil in the tissue. After wiping if the skin is left too tight or stretched with a feeling or dryness as well as parched then it is sure to be dry skin. It is sure to be normal skin if it is supple, lively, vibrant and elastic. Thus it is simple test to determine your skin type. People having sensitive skin can point out it when the skin tends to be tight and blotchy and reacts to new skin-care products by becoming red, inflamed or even itchy. There are even online skin tests which are now available in many tests. For knowing the strategies of the skin it is very important to identify your skin type.

Don't worry! Be happy!

Smiling is the ultimate beauty tip and the best way to look and feel like a million bucks. Smiling is the best way to get rid of anxiety, anger, and nervousness. A smile triggers something in your brain that releases endorphins, which are hormones that make you happy. Smiling is the essential tool to real beauty.

It will also make others feel good too!! 

Too Faced creamy eyeshadow!

Finally a fool-proof cream eye shadow. I’m loving Too Faced’s new Lock Down Ultimate Creaseless cream eyeshadows with their famous Shadow Insurance lid primer already built in.


So easy to apply and they last, last, last…plus, they’re water resistant, making them the perfect shadows for weddings!

If you read the product info on Too Faced’s website (which I must say does not do justice to Lock Down’s actual very pretty, subtle colors), you’ll read something about “deep, intense, metallic pigments.” For those of you who are afraid of “metallic” eyeshadows, fear not! I’m not crazy about shiny, shimmery eye shadow myself, but the great thing about Lock Down is that the moment you apply it, it begins to soften down to a subtle luster…stunning. And if you want that metallic intensity, just built it up. Easy, peasy.

And yes, it really is easy. Just squeeze a tiny, and I mean TINY, amount onto your fingertip or a taklon makeup brush — I used my concealer brush — applied directly to your eyelid. Lock Down can be used alone, layered with other Lock Down colors or as a primer base for other your other eye shadows.

Too Faced Lock Down Creaseless Eye Shadow’s benefits are many indeed.

Creaseless - NO creasing, fading or smudging
Water Resistant - rain, snow, tears, skinny-dipping. Now all possible without ruining your eye shadow.
Healthy - paraben-free and enriched with Vitamin E. So nice!
Easy and effortless - quick and easy to apply and so long-wearing
Veritile - wear Lock Down alone, layered with other Lock Down shades or as your eye shadow base
So there you go. Easy, pretty, CREASE-FREE cream eyeshadow. It’s all in there!

(If you are a MAC girl like me I have to say I love Paint Pots and Paints too!!!...more on those later)

MAC Pigments!!

MAC Pigments are great! Here's a little bit of information about them. First you should know they do come by weight in each container not volume. Containers can appear to be less than full due to settling of the product. Mine always last a long time!!


1. What is a MAC pigment? The MAC pigment is one of the most popular and most sought after products from their cosmetic line. It is basically a multi-purpose loose powder color that can be used as a lip color, eye color, nail color, eyeliner, blush, bronzer, highlighter and whatever else you can think to do with it. (see # 5 for details about product usage)
Pigment is a highly concentrated loose colour powder that contains ingredients to help it adhere to the skin. Create a subtle wash of colour or an intense effect. Does not streak or cake. Easy to blend and long-lasting. 

2. Where can I buy MAC pigments? Pigments are sold at MAC freestanding stores (which carry the permanent line), PRO stores (which carry the permanent line + PRO colors) and MAC counters (which carry only pigments from collections).
Full sized jars and samples are available for purchase on ebay, but it's not recommend buying pigments from there as it's notorious for the amount of fakes.

3. What do I use to apply a pigment? Vaseline, Mixing Medium, Visine, MAC Shadesticks, MAC ream color bases, water and even lip balm. Basically anything that will make the pigment adhere to your skin, though it is important to note that products that do not dry, such as lip balm or Vaseline will crease and will not have the staying power an eye shadow base will.

4. What are the best tools to use to apply my pigment? There is no one good answer but here is a list of what we’ve gathered from the threads on MAC pigments:
· MAC 224 
· MAC 213 
· MAC 217 (for hint of color, like brow highlighting)
· Small contour brush for highlighting or shaping
· Non-latex sponges (to help clean up the fallen particles)

5. **IMPORTANT** Like anything, there are certain guidelines, and pigments have them too. Not every color can be used everywhere. 

These colors can’t be used around the eyes and are for the lip area only:
Acid Orange
Bright Fuchsia
Electric Coral
Ruby Red

These can’t be used on the lips and are only recommended for the body and eyes :
Black, Chartreuse
Clear Sky Blue
Cornflower
Deep Brown
Emerald Green
French Violet
Golden Olive
Landscape Green
Marine Ultra\
Naval Blue
Polished Ivory
Primary Yellow
Pure White
Rich Purple
Steel Blue
Teal
True Chartreuse
Violet

Lastly these colors are for the body only and are not recommended on the eyes or the lips (but work fine as blushes ect..):
Basic Red
Burnt Burgundy
Cool Pink
Dusty Coral
Genuine Orange
Grape N
Nocturnal Plum
Pink Vivid

6. How can I use them? Wet or dry, you only need very little to get a big payoff.

You can mix pigments (while heeding the important warnings!) with many bases like:
· Nail polish
· Lip-gloss
· Mixing medium (to make your own eye-liner)
· Moisturizer to get some shimmer/color

7. Also, pigments cost around 19.50$ US/23$ CAD

Friday, May 29, 2009

Beauty By Janea

I think pictures say a lot. I wish my camera wasn't so illiterate! LOL! 

I started a Fan Page on Facebook. Each day I send out updates with fun information in it regarding skin care and makeup tips and tricks. Please feel free to add yourself and enjoy the knowledge you can get on making a more Beautiful You!

http://www.facebook.com/pages/Fort-Myers-FL/Beauty-by-Janea/104946478781?ref=mf

Maid of Honor